How to Install a Crawl Space Vapor Barrier
Installing a crawl space vapor barrier is a crucial step in maintaining a healthy and moisture-free home. By creating a barrier between the ground and your home's foundation, you can prevent moisture-related issues like mold, mildew, and structural damage.
In this step-by-step guide, we’ll walk you through how to install a Crawldryer crawl space vapor barrier to ensure a safe and comfortable living environment for you and your family.
🧰 Step 1: Gather the Necessary Supplies
Before you begin, make sure you have all the essential tools and materials:
-
✅ Crawldryer Professional-Grade Vapor Barrier
-
✅ Utility knife
-
✅ Tape measure
-
✅ Staple gun or construction adhesive
-
✅ Gloves and safety mask
Having everything prepared will make the installation smoother and more efficient.
🧹 Step 2: Prepare the Crawl Space
Start by clearing the crawl space of:
-
Loose debris
-
Old insulation
-
Any existing or damaged vapor barriers
It's important to begin with a clean and level surface to ensure proper adhesion and coverage of the new barrier.
📏 Step 3: Measure and Cut the Vapor Barrier
-
Measure your crawl space dimensions carefully, including around piers, vents, and other obstructions.
-
Cut the vapor barrier according to your measurements, allowing for a few extra inches on each edge to ensure overlap and full coverage.
Tip: Use chalk or markers to outline cuts before trimming.
🧱 Step 4: Install the Vapor Barrier
-
Lay the vapor barrier flat on the crawl space floor and position it evenly.
-
Use a staple gun or adhesive to secure the barrier to the foundation walls, piers, and any vertical surfaces.
-
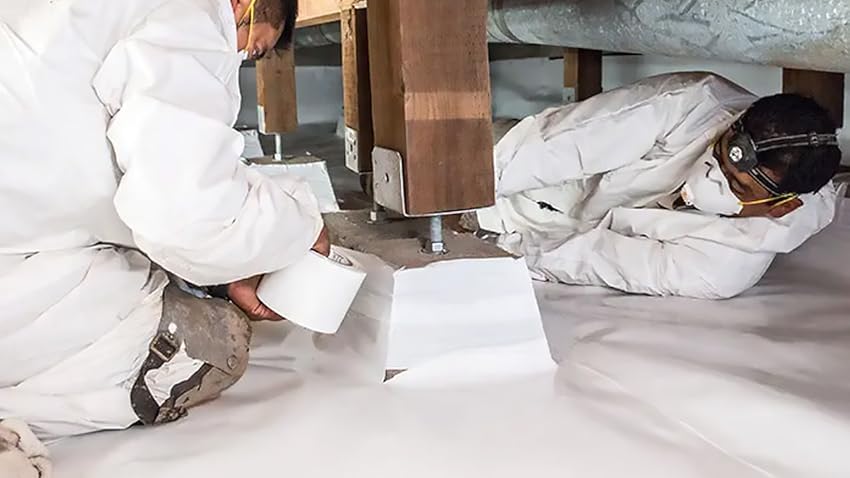
Overlap all seams by at least 6 inches and secure with waterproof tape or adhesive to prevent air or moisture leaks.
🔒 Step 5: Seal the Edges and Penetrations
Moisture can still seep in around:
-
Pipes
-
Vents
-
Other crawl space penetrations
Use tape or adhesive to seal around these areas carefully. A thorough seal ensures the vapor barrier is as effective as possible.
🔍 Step 6: Inspect and Monitor
After installation:
-
Inspect all sections to ensure they’re secure and fully sealed.
-
Over the next few weeks, monitor the crawl space for any signs of lingering moisture, condensation, or damp smells.
If everything remains dry, congratulations—you’ve successfully protected your home from crawl space moisture!